Step by step tutorial for provisioning an Azure SQL database in the cloud using a Microsoft account.
Welcome to this comprehensive guie to provision a new Azure SQL database. In today’s data-driven world, managing and analyzing data efficiently is more important than ever before. Microsoft Azure provides a powerful, scalable, and secure platform for managing your data, and with Azure SQL Database, you can harness the full power of SQL in the cloud.
This tutorial will guide you through the process of creating a new Azure SQL database step-by-step, with detailed screenshots and explanations. By the end of this tutorial, you’ll have a fully functional Azure SQL database up and running, ready to store and manage your data.
Table of Contents
1. Connect to the Azure portal to provision a SQL database
The prerequisites are that you already have an active Azure account and credits available to provision new ressources.
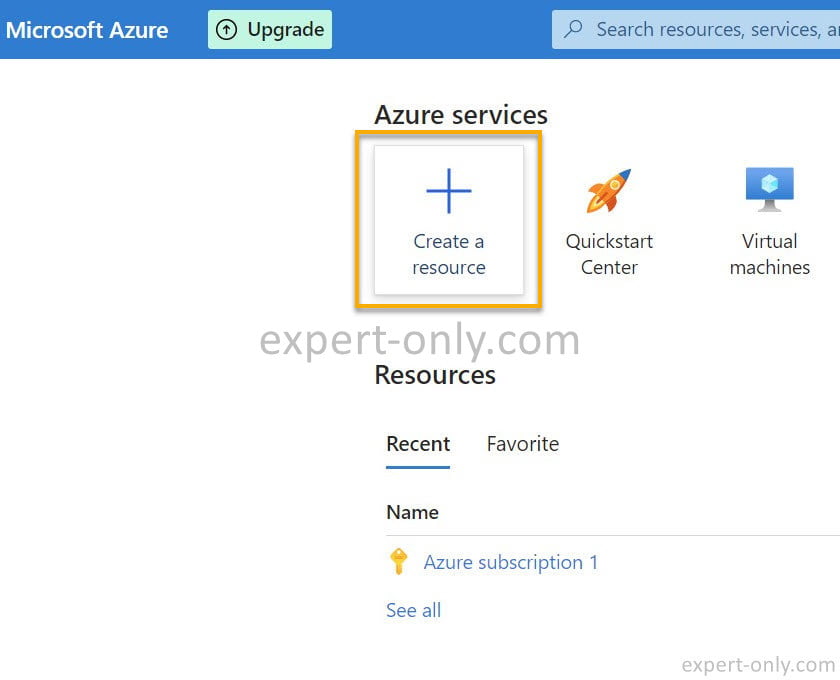
- Navigate to Navigate to https://portal.azure.com/#home
- Select the Create a resource button to access the marketplace menu.
Video tutorial with all the steps to provision an Azure SQL Database
2. Search for the Azure SQL resource
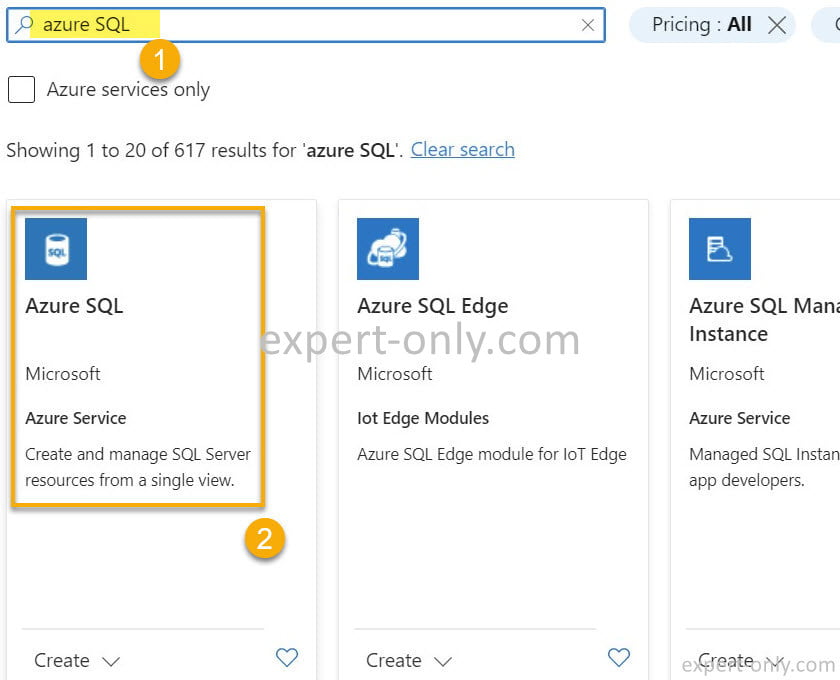
- In the search bar type azure SQL
- And click on the Azure SQL button.
3. Select the Azure SQL resource
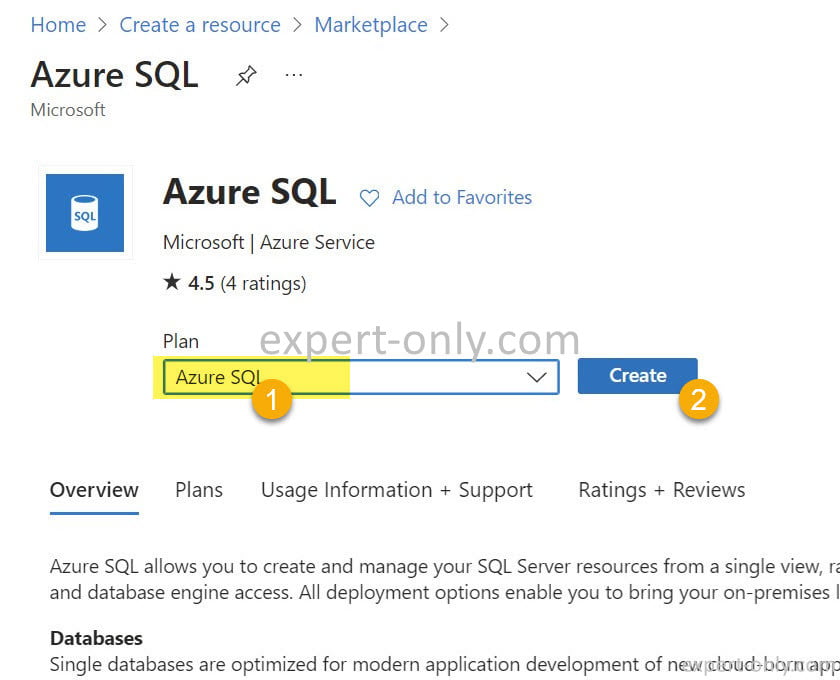
- Double check that the plan selected is Azure SQL
- And click on Create
4. Select the Single database option
Select the Azure SQL database plan for the service. Then :
- Check that the option is on Single database
- and click Create to go to the next step.

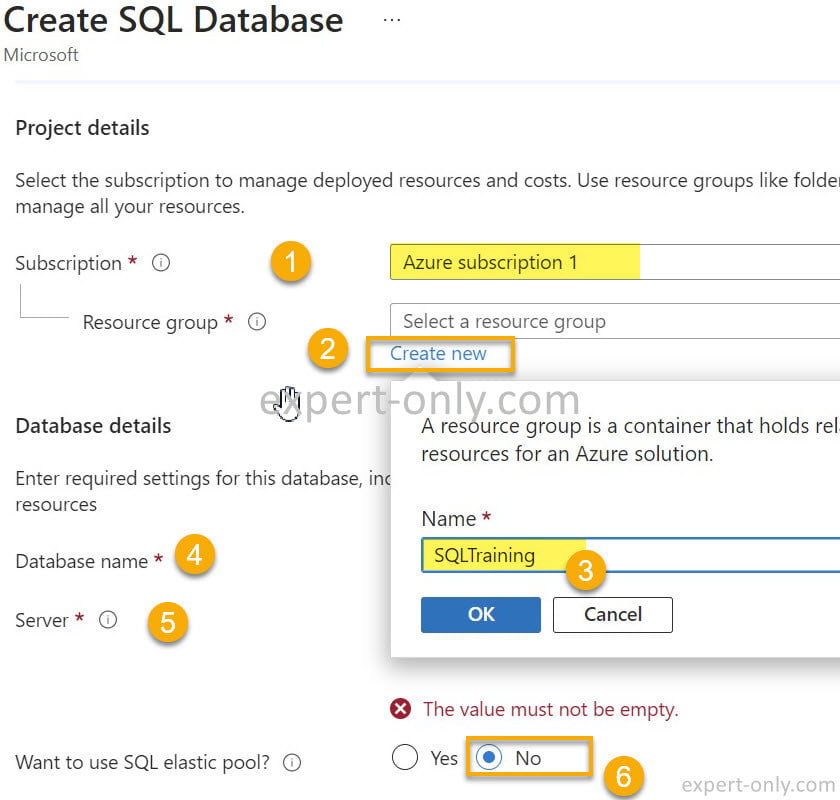
5. Configure the subscription and resource group
In the project details section, we need to configure the subscription and server details.
- Select the Subscription, it is the first one available one by default
- Under Resource group, select Create new
- And enter a valid name, here it is SQLTraining
- Then enter the Database name
- For the Server, you need to select the create new link (not visible on the screenshot)
- Select No for the elastic pool option
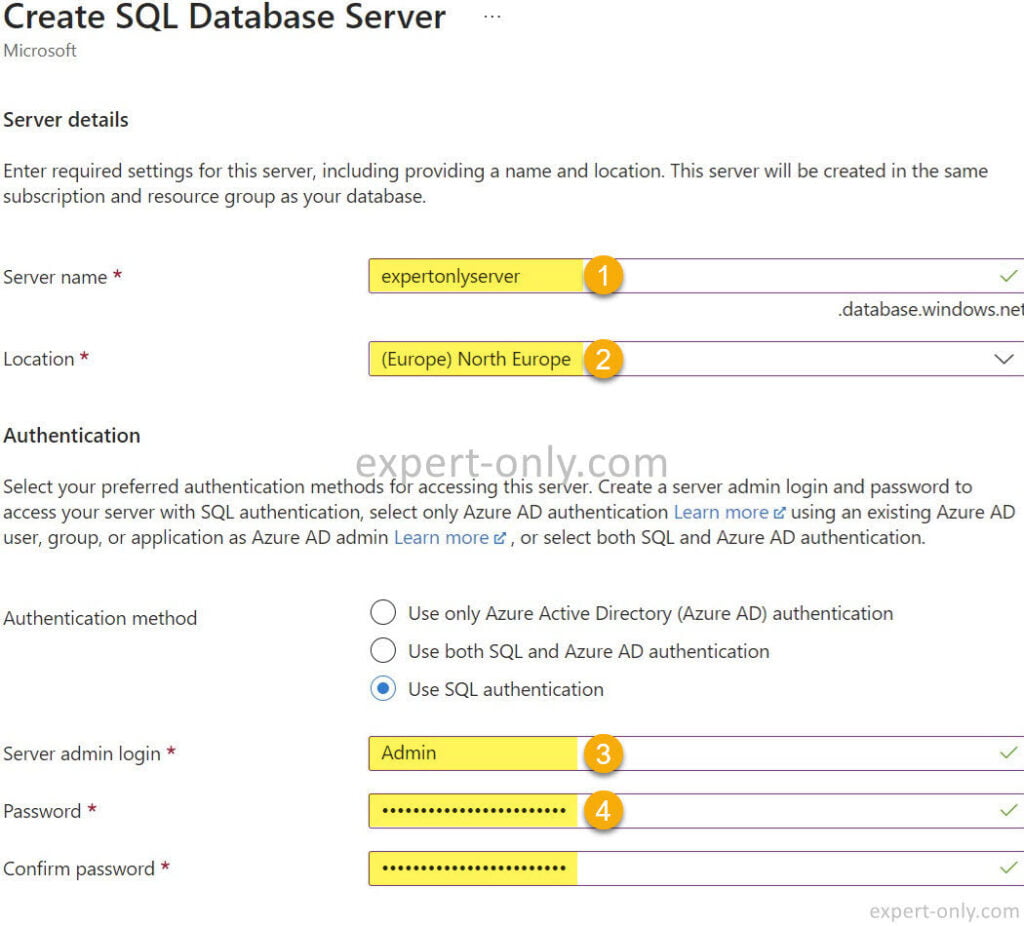
6. Set up the server and the authentication
Once in the Server details section, set up the following information, of course, you need to adjust it to your specific business case.
- Type the Server name, here it is expertonlyserver (no uppercase or special characters allowed)
- Select the Location, select the closest to the Azure database users.
- Select the Use SQL authentication option and enter the admin login : here it is Admin
- Enter and confirm the password.
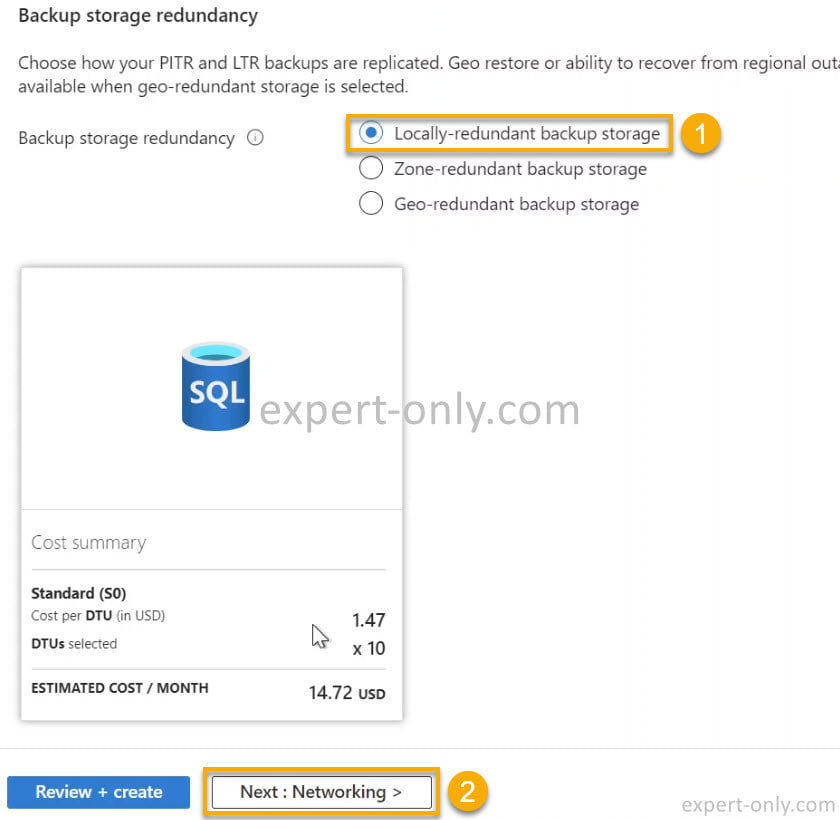
7. Set up the backup storage options
- Select the the Locally-redundant backup storage option
- Then validate using the button Next : Networking > to go the networking section.
8. Configure the Azure database connectivity and firewall
To do so, from the Networking section, follow these 3 steps, as explained and illustrated in the screenshot below:
- Select the Public endpoint as Connectivity method
- Activate the options to grant the Azure services access and to add the current IP address in the firewall rules.
- Then validate to go the Security section.

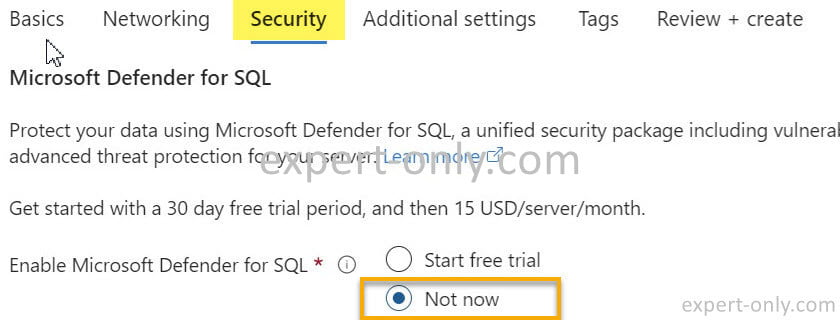
9. Disable Microsoft Defender for SQL
Simply select Not now to disable the options for the threat protection provided by Microsoft.
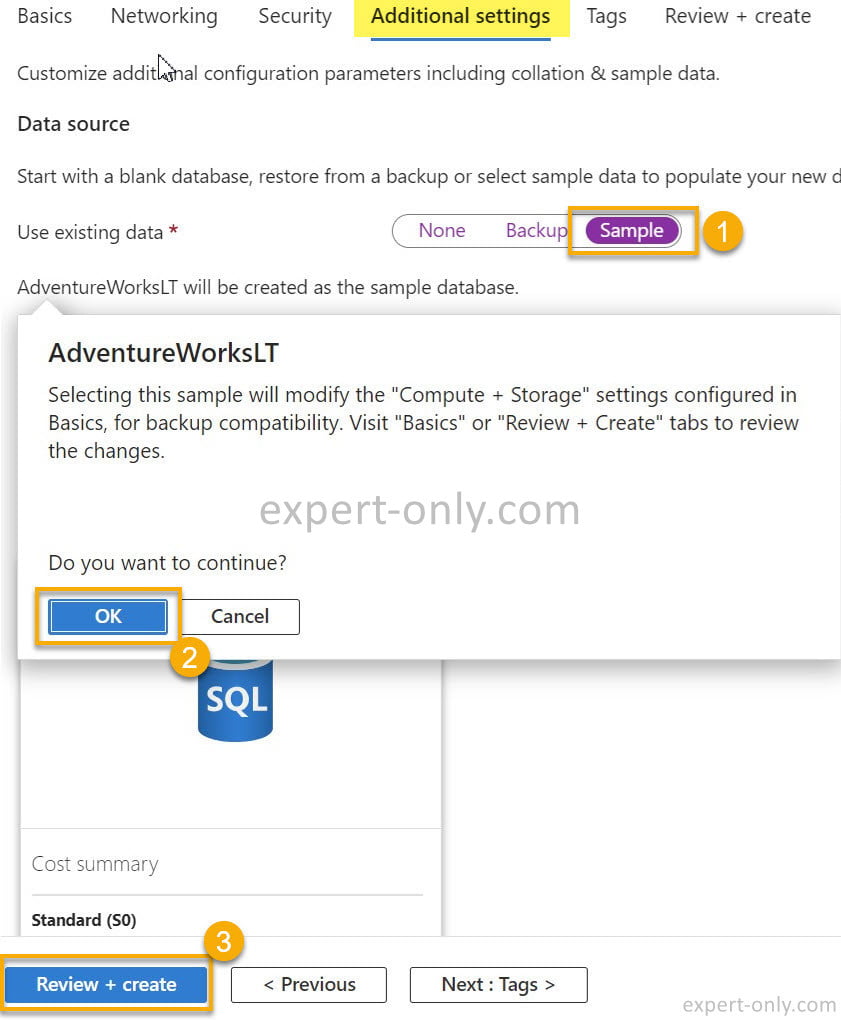
10. Use AdventureWorksLT as a sample SQL database
To generate sample data in the new Azure database:
- Use the Sample option
- Validate to create the AdventureWorksLT database in your set up.
- Click on Review + Create to see the summary of all the settings before the actual creation.
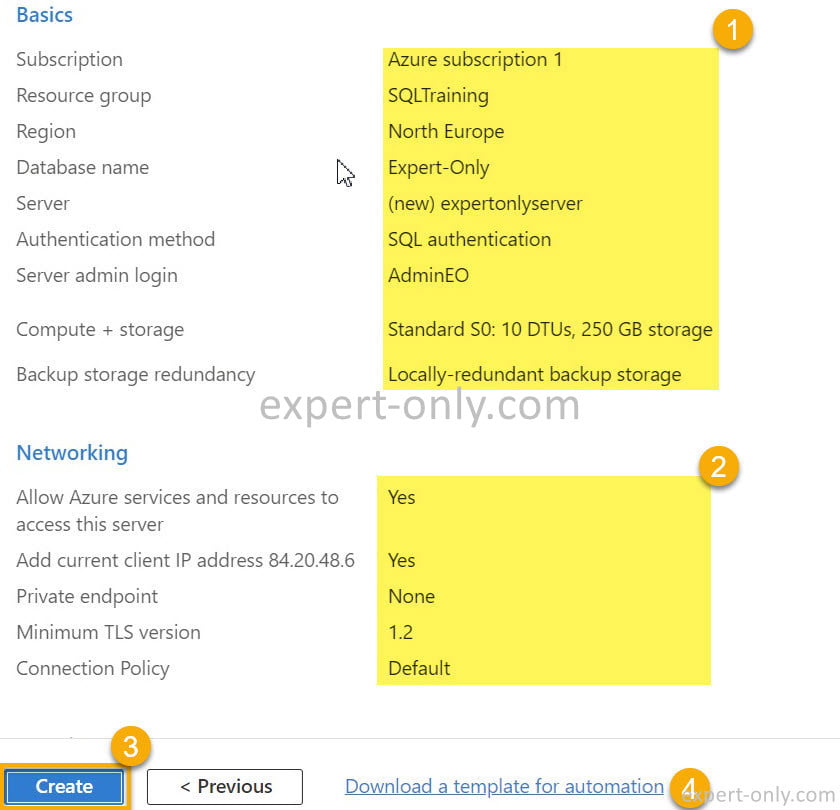
11. Review the settings and provision the Azure SQL database
- Review the options in the Basics section
- And in the Networking one
- Then click on the Create button to actually create the Azure SQL server and the database.
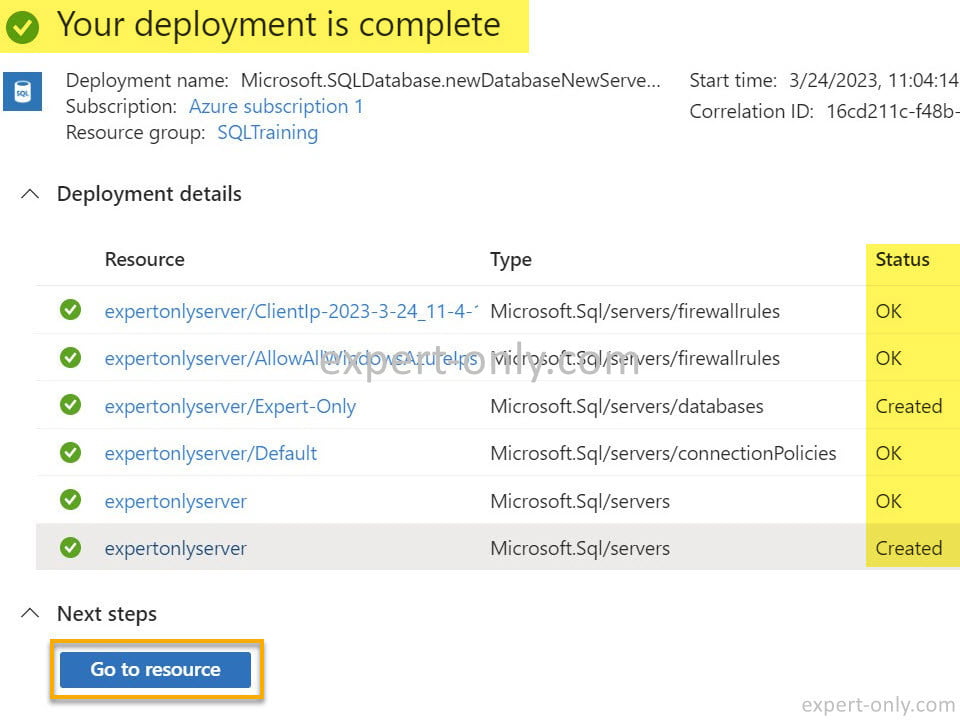
12. Check the successful deployment message
After about 5 minutes, all the steps are finished and the message Your deployment is complete is displayed on the Azure portal.
Conclusion on provisioning a new Azure SQL database
Congratulations on successfully following the tutorial on how to provision a new Azure SQL database on Microsoft cloud. By following this tutorial, you have learned how to navigate the Azure portal, configure your database subscription and resource group, and set up server and authentication details. Then how to configure backup storage redundancy, and manage database connectivity and firewall options.
You have also created the AdventureWorksLT sample database, giving you a foundation to explore Azure SQL’s features and capabilities further. With your new Azure SQL database in place, you’re now ready to build, manage, and scale your data-driven applications on Microsoft Azure. Happy data managing! And good luck.

Be the first to comment