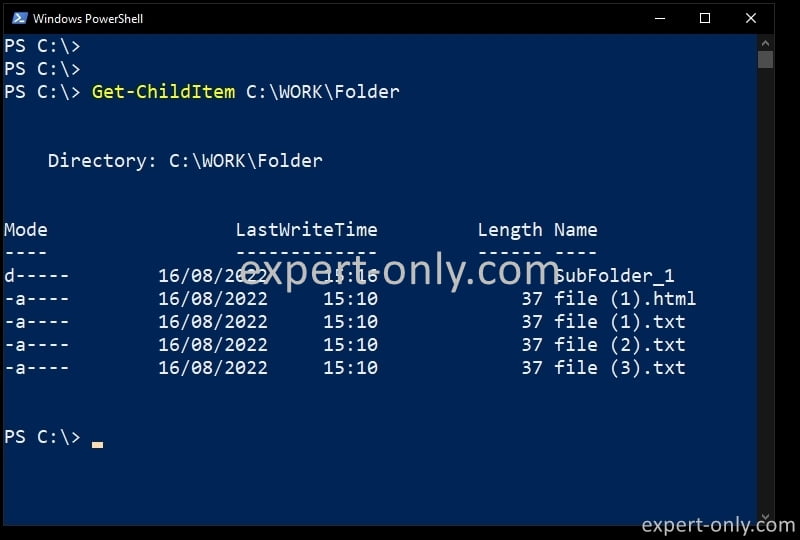
Introduction to file listing using the PowerShell command line tool.
PowerShell is a powerful tool used for executing commands and scripting in Windows environments. You can for example list files using PowerShell for example. While copying files is an essential task, listing files, folders, and subfolders is equally important and can be done using PowerShell’s Get-ChildItem command. This tutorial provides a comprehensive guide on listing files using PowerShell.
Table of Contents
1. List files and folders using PowerShell (including subfolders)
Windows PowerShell provides the Get-ChildItem command, allowing you to list files and directories within a specified path. It can be combined with other options and parameters for more complex listing tasks.
1.1 Basic Listing of files in a folder
To list all files and directories in a specific folder:
Get-ChildItem C:\WORK\Folder

1.2 List files and filter by extension name
For example, to list only the text files identified with the .txt extension, use the wildcard and the txt in the filter, like in the example below:
Get-ChildItem C:\WORK\Folder -Filter "*.txt"
1.3 Exclude specific items by extension
To exclude some files, use the same principle, as in the previous section, but this time with the Exclude keyword, like the .docx Word documents like below:
Get-ChildItem C:\WORK\Folder -Exclude "*.docx"
Explore more about how to manage files using PowerShell with this tutorial on how to copy recursively Windows files and folders.
2. List files and folders with attributes
PowerShell is a powerful scripting language and shell used by administrators to automate tasks in Windows. Working with file attributes in PowerShell allows you to manage file properties like size, type, creation date, and permissions programmatically. Here’s how you can do it:
2.1 Display the file size with PowerShell
You can retrieve the file size using the Get-Item cmdlet. Here’s an example to check the file size on the disk.
$file = Get-Item "C:\WORK\Folder\file.txt"
$file.Length
This will return the file size in bytes. Learn more about working with file sizes in PowerShell.
2.2 Get the file extension
You can identify the file type by checking its extension. The script below, for example, will return the extension, in this case it is .jpg.
$file = Get-Item "C:\WORK\Folder\image.jpg"
$file.Extension
2.3 Get the creation date of a file in PowerShell
You can retrieve the creation date of a file using the following code:
$file = Get-Item "C:\WORK\Folder\file.txt"
$file.CreationTime
This will return the creation date and time. Discover more methods to find the creation date of files in PowerShell.
2.4 Work with files and folders permission
You can manage file permissions using the Get-Acl and Set-Acl cmdlets. Here’s an example of how to retrieve permissions:
$acl = Get-Acl "C:\path\to\file.txt"
$acl.Access
3. Combine Get-ChildItem with other PowerShell commands
Combine Get-ChildItem with other cmdlets for more advanced operations. For example, list files and send the list through a pipe to another PS command:
Get-ChildItem C:\WORK\Folder | ForEach-Object { /* Do something with each item */ }
Conclusion on listing files and folders using PowerShell
Listing files using PowerShell provides a powerful way to manage and manipulate file structures within Windows. The Get-ChildItem command offers various options for filtering, excluding, and working with different attributes, providing flexibility for different tasks. To go further, let’s dive into how to copy files recursively using PowerShell.


Be the first to comment