Import an Excel file into a SQL Server table with an SSIS package.
Step by step tutorial to import data from an Excel file (xslx) into a SQL Server table with an SSIS package. Here, the target is a SQL Server database. From Visual Studio, use the native Excel component available in the SSIS data stream source connections.
To load one or more Excel files into a SQL Server database with Visual Studio, first create an SSIS package. First, open Visual Studio and create a new SSIS project and a new package as explained in the dedicated tutorial.
Table of Contents
1. Prepare the target table and the Excel source file to import
The destination table is the customer table with a basic structure, here is the code to create it.
-- Create the customer table
CREATE TABLE [dbo].[Customers](
   [CustomerID] [int] NOT NULL,
   [FirstName] [nvarchar](20) NULL,
   [LastName] [nvarchar](20) NULL,
   [City] [nvarchar](20) NULL,
   [Country] [nvarchar](50) NULL,
   CONSTRAINT [CustomersPrimaryKeyCustomerID] PRIMARY KEY CLUSTERED ([CustomerID] ASC)
);
GO
This customer file, to be imported into the table in this tutorial contains 48 lines. The file has the same structure as the target table, i.e., 5 columns. Download the example file here:
2. Create an SSIS data flow from the Excel to SQL Server
In Visual Studio 2019, from the workspace, in the toolbox on the left. Select Data flow Task. Select Data flow Task. And drag the component onto the workspace. Double click to edit it.

3. Create a new connection manager to connect to the Excel file
Create a new connection to the Excel file from the SSIS Connection Manager.
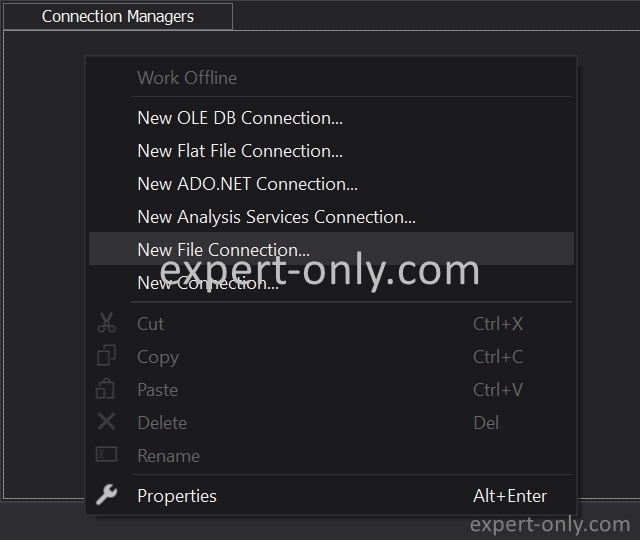
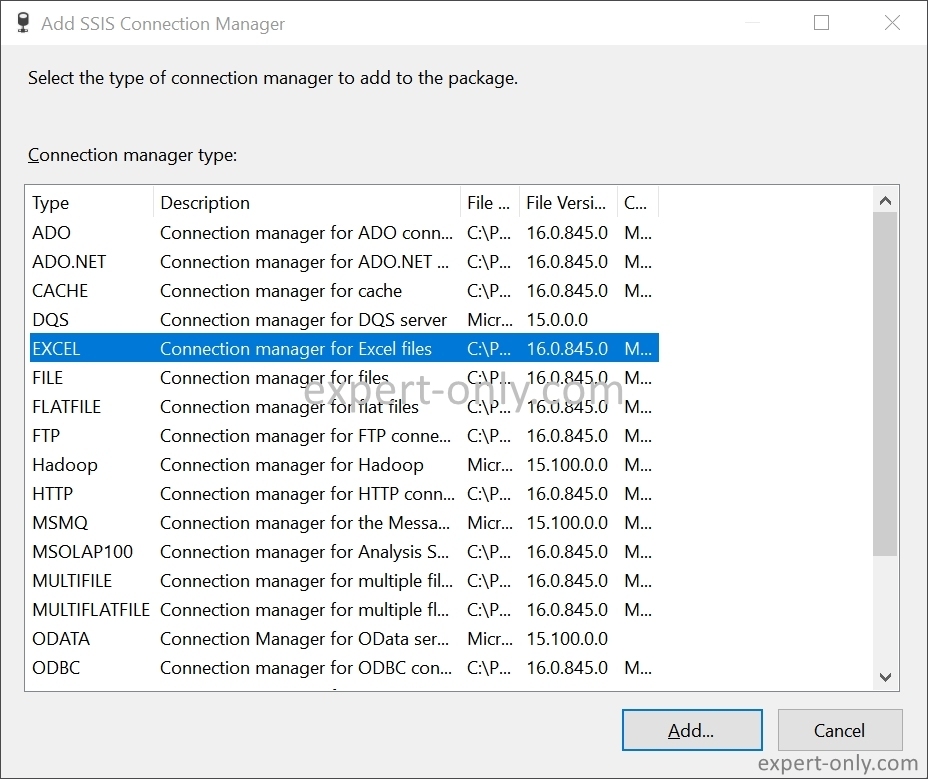
Then select the connection manager for Excel files from the list.
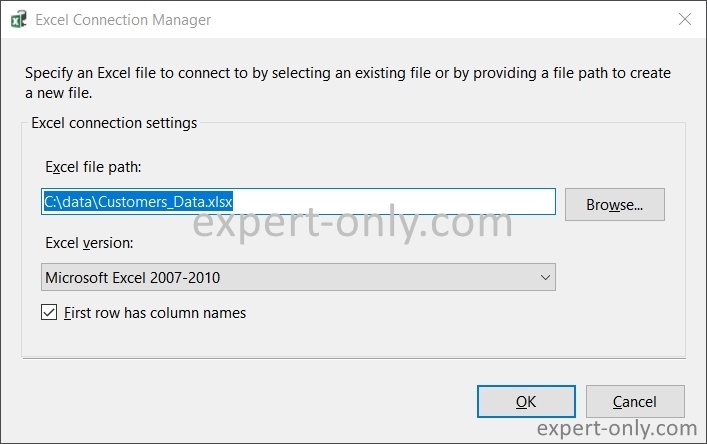
Now fill in the following items:
- The full path of the Excel file to import into the SQL table, i.e.: C:\data\Customers_Data.xlsx
- The version of Excel, choose Excel 2007-2010.
- Enable the option for column names in the first row.
4. Configure the Excel source component
From the Data Flow tab, select the Excel Source component from the toolbox and drag it into the workspace.

From the Excel Source component, choose the tab from the list, as below. The default tab name is displayed, i.e., Sheet1$. It is also possible to use an SQL query directly, to load a specific range of cells and not the whole table into the table. The query is of this type, and it selects all the data stored contiguously in the file. That is, a range of Excel data:
SELECT * FROM [Sheet1$A1:E]
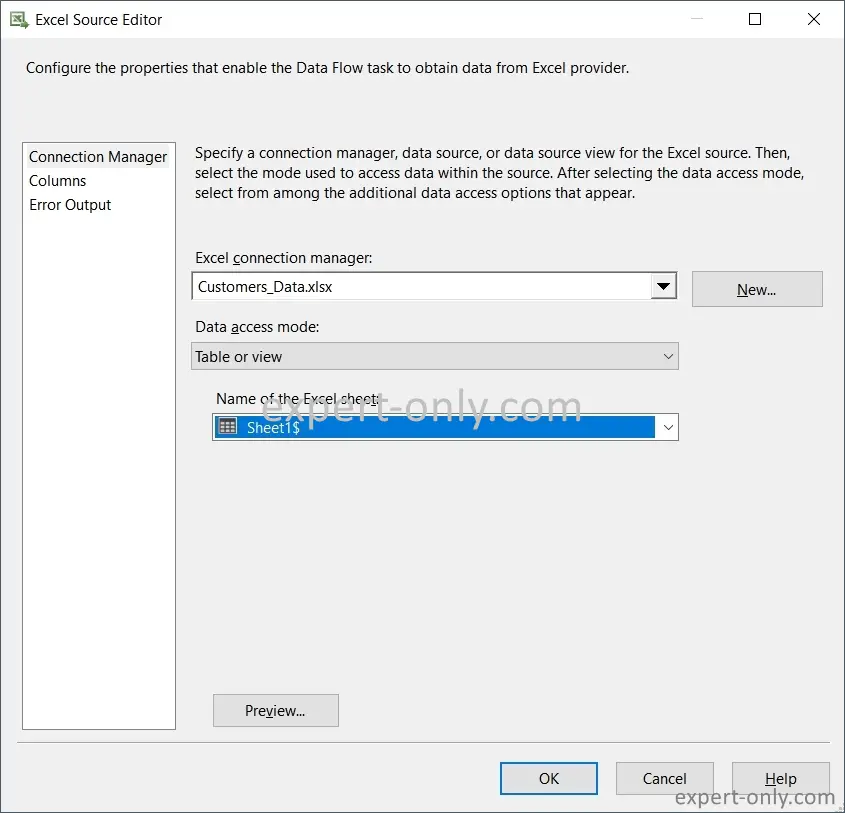
Now check the mapping to make sure that all columns are detected in the SSIS package.
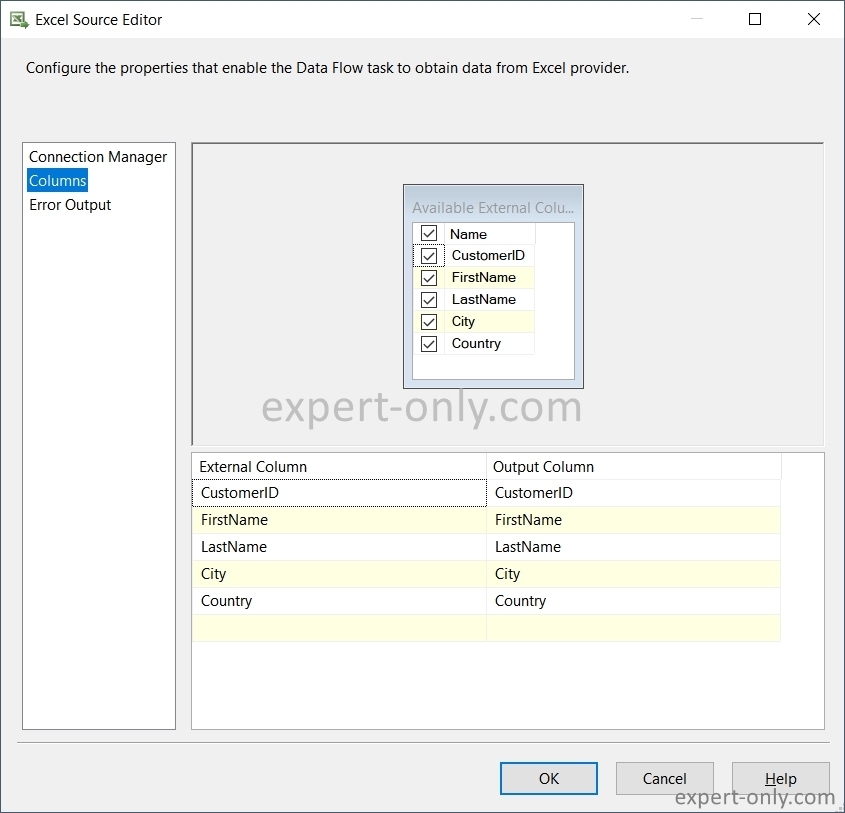
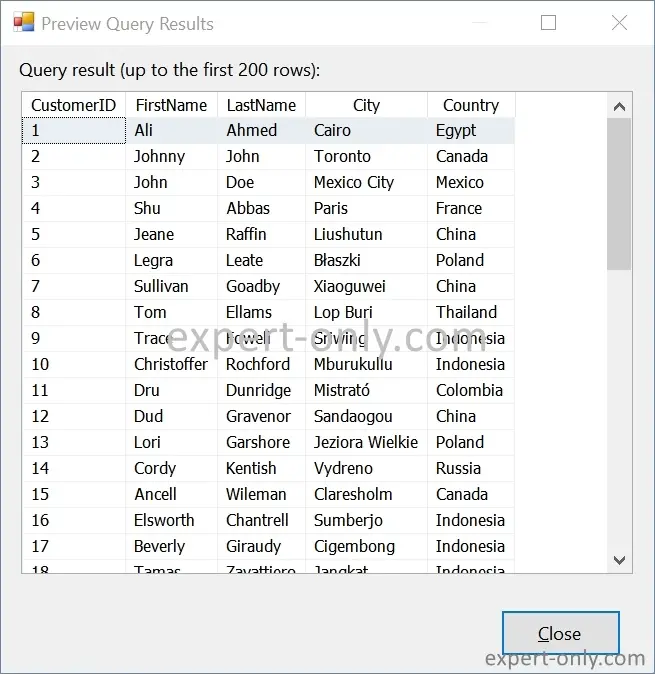
Use the Preview button to preview the data and validate the content.
Classical Excel connection error from SSIS
On first connection to the file, if the following error is displayed:
Could not retrieve the table information for the connection manager ‘Customers_Data.xlsx’.
Failed to connect to the source using the connection manager ‘Customers_Data.xlsx’
Or this longer but explicit message:
Exception from HRESULT: 0xC020801C
Error at PackageImportExcelFile [Connection manager ‘Customers_Data.xlsx’]: The requested OLE DB provider Microsoft.ACE.OLEDB.12.0 is not registered. If the 32-bit driver is not installed, run the package in 64-bit mode. Error code: 0x00000000. An OLE DB record is available. Source: ” Microsoft OLE DB Service Components ” Hresult: 0x80040154 Description: ” Class not registered “.
Error at PackageImportExcelFile [Connection manager “Customers_Data.xlsx”]: The ‘Microsoft.ACE.OLEDB.12.0’ provider is not registered on the local machine. For more information, see http://go.microsoft.com/fwlink/?LinkId=219816
Error at Data Flow Task [Excel Source [2]]: SSIS Error Code DTS_E_CANNOTACQUIRECONNECTIONFROMCONNECTIONMANAGER. The AcquireConnection method call to the connection manager ” Customers_Data.xlsx ” failed with error code 0xC0209302.
Then check again if the Excel drivers are installed and in the right version.
How to manage the 32-bit and 64-bit Excel driver versions?
Visual Studio works in 32-bit and SSIS works in 32-bit or 64-bit. It is therefore necessary to install the drivers corresponding to the project. This is a very complex topic as it is not possible to install 32-bit and 64-bit versions in parallel with the 2016 drivers. A more detailed article on this specific configuration will be written.
If the Office version is installed in 64-bit, then avoid reinstalling all Office 365 applications. So, use this solution to run the package and load the Excel file without errors:
- Install the Excel Access Database Engine 2016 drivers for SSIS in 64-bit version.
- Install the Excel 2010 driver in 32-bit version.
5. Change column types at the output of the Excel Source component
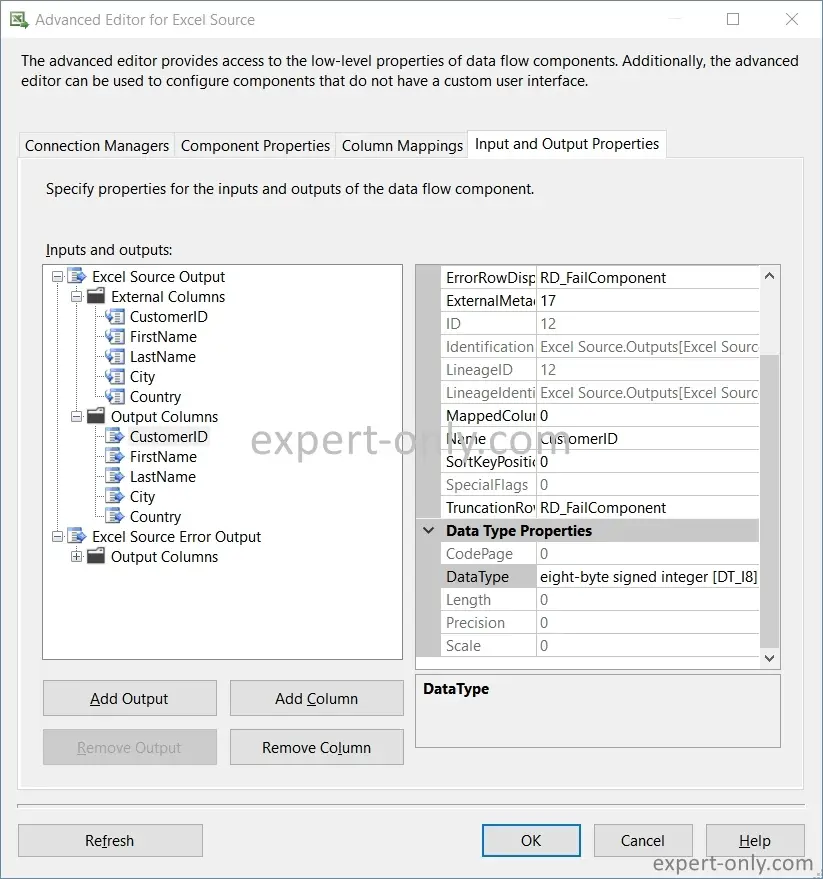
By default, the type of an Excel text column is DT_WSTR with a length of 255 characters. Indeed, during an import with SSIS, all new connection to an Excel file as the default values.
From the Advanced Editor for Excel Source, choose the data type DT_I8 for the CustomerID column which is of integer type in the table. Open the editor by right-clicking on the Excel Source component. Modify only the Output Columns section.
Choose the data type DT_WSTR for all other columns and adjust the length to the lengths in the customer table.
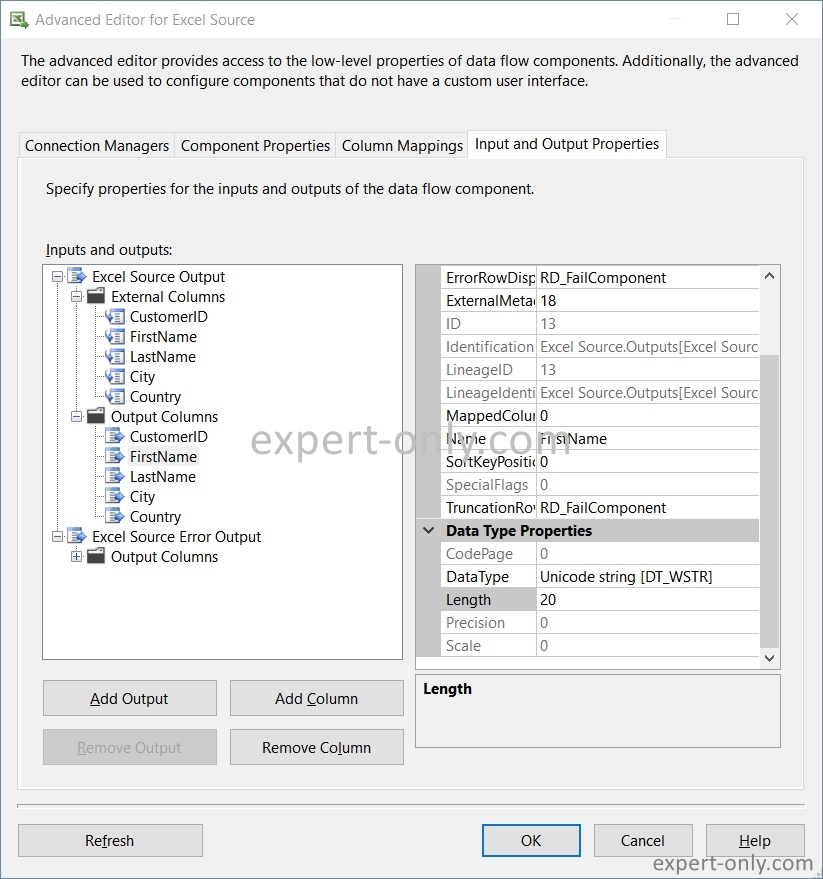
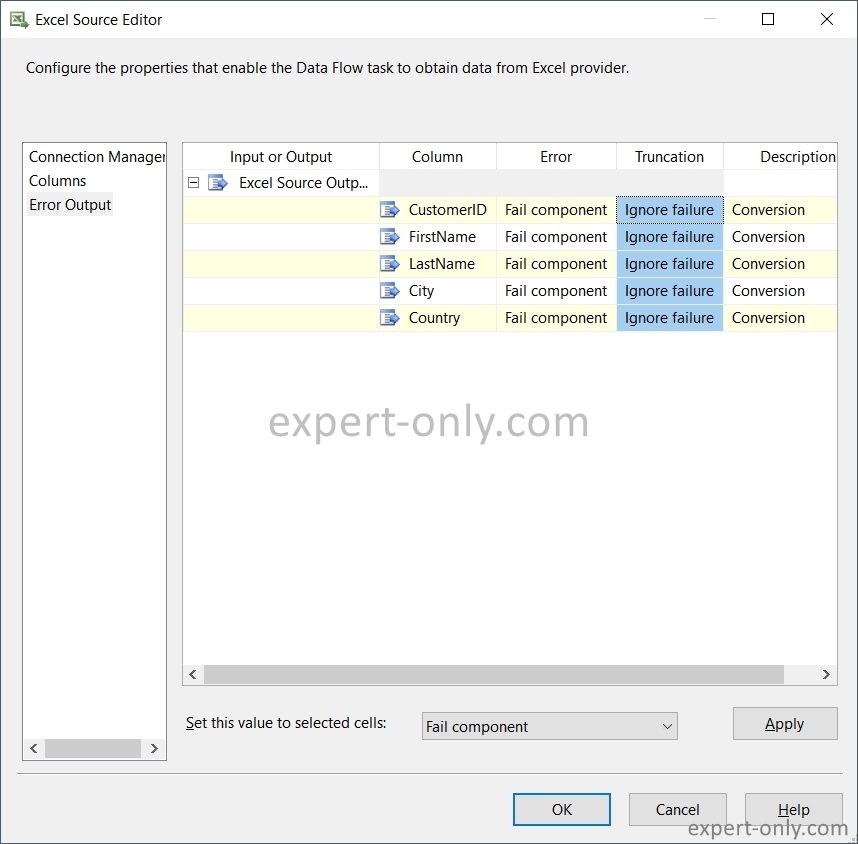
Open the Excel Source Editor component and change the Error Output section to ignore data truncation errors. Use this if you are sure that the file does not contain data with an incorrect length.
6. Configure the SQL Server target table to import the Excel file
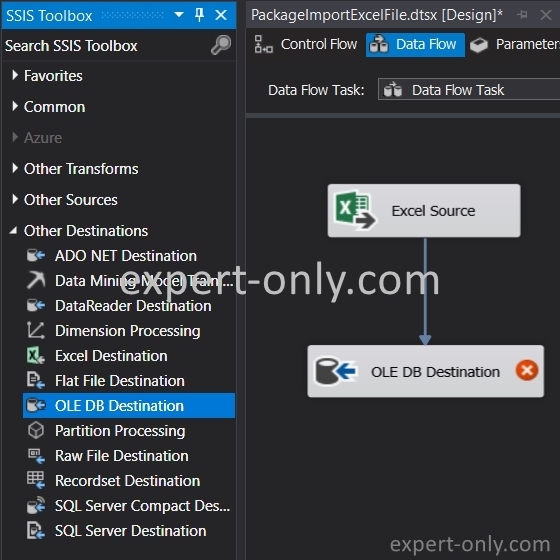
Now, in the SSIS Toolbox, select the type of destination to load the Excel file into. From the Other Destinations section, choose OLE DB Destination. And drag the component into the data flow. Then link the two components, Excel Source to OLE DB Destination with the arrow.
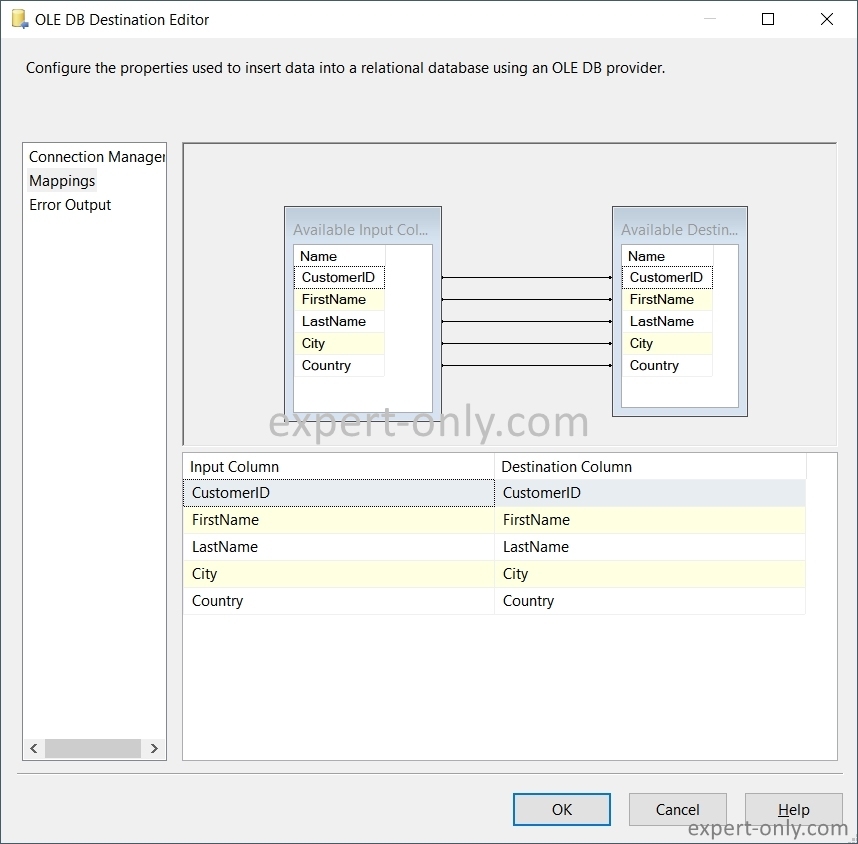
Then double click on OLE DB destination and choose the database to load the file into. Create the database connection beforehand. The data mapping is automatic because it is based on the column names which are the same between the Excel file and the SQL Server table.
7. Run the SSIS package and import Excel data into SQL Server
Finally, click on the run button at the top of the page. Or press F5, to run the package. The SSIS run starts to import the data from the Excel file into the SQL Server database. The SSIS Excel Source and OLE DB Destination components turn green, so it is a successful run.
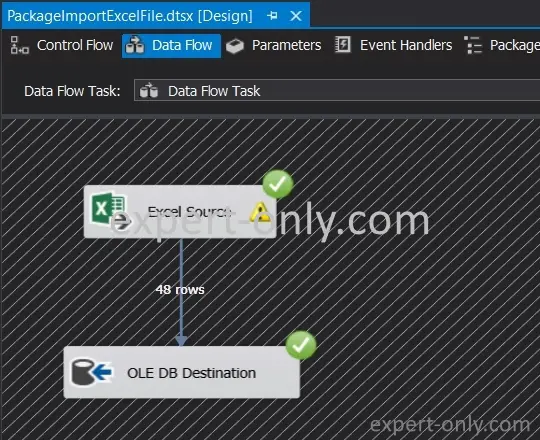
In addition, the number of rows used is visible on the Visual Studio screen. The yellow warning sign indicates a potential truncation of characters. To remove the warning, double check that the source and target columns have the same length in the metadata. For example NVARCHAR(20) for SQL Server and a compatible data type like (DT_WSTR,20) for SSIS.
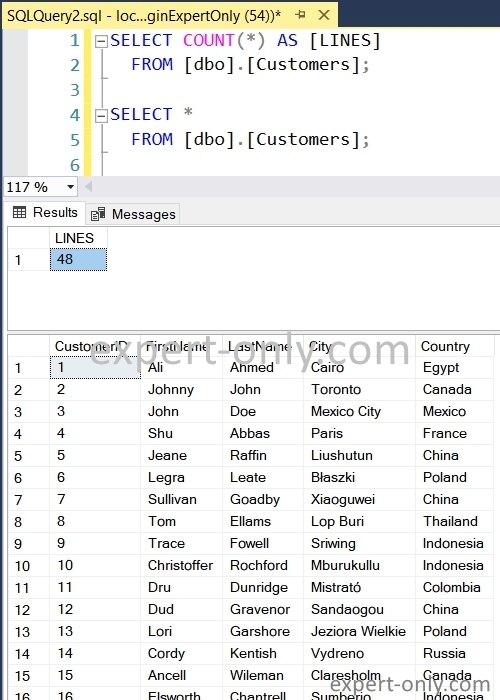
8. Check the result using SSMS and a SQL query
After the SSIS import, check that the 48 rows in the Excel file are in the table without error. Execute these two queries from SSMS.
SELECT COUNT(*) AS [LINES]
  FROM [dbo].[Customers];

SELECT *
  FROM [dbo].[Customers];
Conclusion on Excel data import with SSIS
To conclude, this tutorial shows how to import an Excel file into a SQL Server table with SSIS, and it is not especially difficult. But the configuration of the development environment and in particular the management of the Excel drivers with 32-bit and 64-bit versions makes the task more complex. Finally, here is another tutorial for importing a text file in CSV format into a SQL Server database with SSIS.


Be the first to comment