Step by step guide on how to install SQL Server Integration Services Projects in Visual Studio 2019.
Microsoft BI tutorial on how to install SSIS in Visual Studio 2019. One prerequisite to this tutorial is to have Visual Studio 2019 already installed on your computer, running for example on the Windows 10 Pro operating system. With Visual Studio 2017, SSIS, SSAS and SSRS projects were available with the installation of SSDT (SQL Server Data Tools).
But since Visual Studio 2019 now the modules are downloadable and installable as independent extensions, without SSDT (SQL Server Data Tools). SSIS tools and services are widely used as a part of MS Decision Support Systems.
Table of Contents
Step-by-step SSIS installation tutorial in video
Install SSIS in Visual Studio 2019 in 3 steps
To install SSIS and create Integration Services projects in Visual Studio 2019, follow these three simple steps. Please note that the screenshots are in English because they were taken with an English version of Visual Studio.
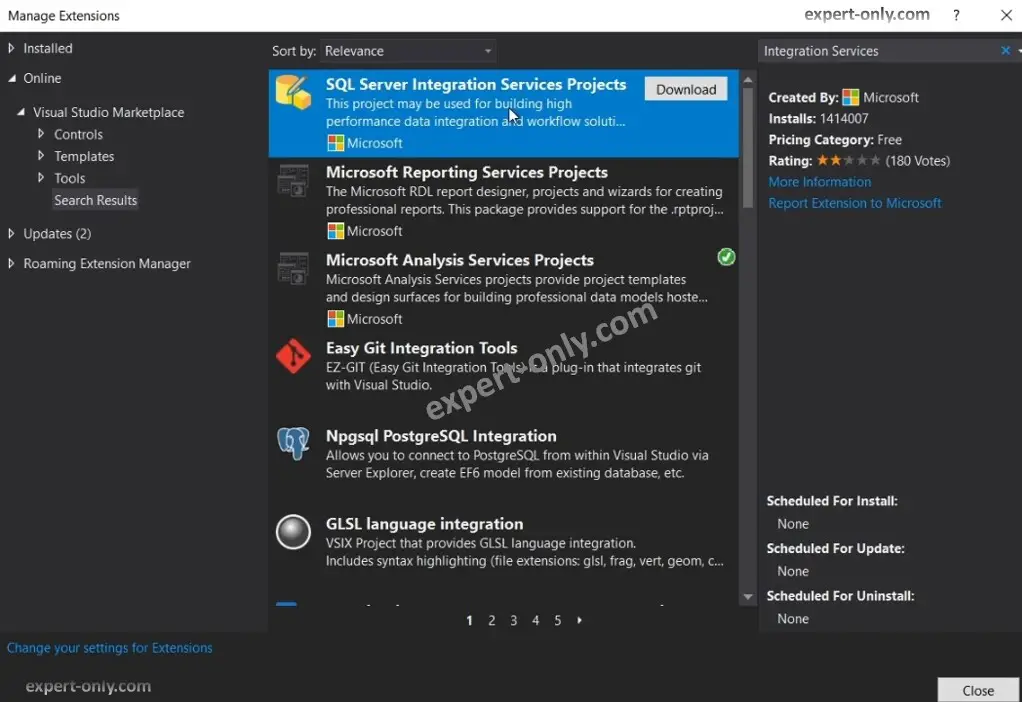
Step 1: Download SQL Server Integration Services Projects extension
To download the SSIS extension, follow these steps:
- Open the Manage Extensions menu in Visual Studio 2019.
- Then search for the Integration Services extension and click Download.
Note that you can also download the extension directly from the Visual Studio Marketplace official website.
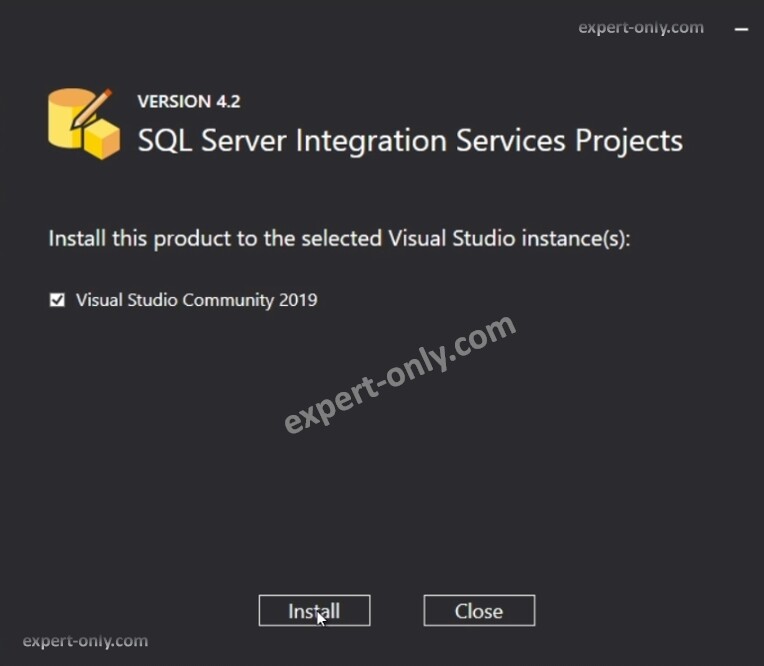
Step 2: Install the SSIS extension in Visual Studio 2019
The installation executable file named Microsoft.DataTools.IntegrationServices.exe is downloaded via the default browser on your Windows system. To avoid installation errors, make sure to use these tips:
- Close all Visual Studio 2019 windows.
- Also close any other SSIS installation windows.
- And if necessary, stop the Windows process called PerfWatson2. To do this, open the Task Manager (CTRL + ALT + DELETE), go to the Details tab, right-click and select End Task.
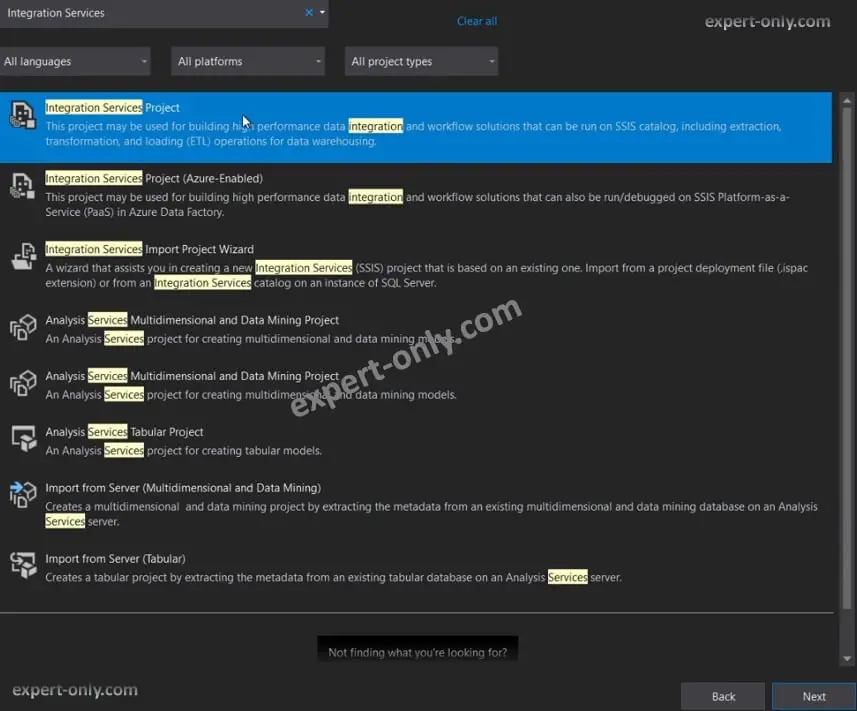
Step 3: Create an SSIS project with Visual Studio
Finally, create a new SSIS project to check that the installation is correct and functional. To do this, first restart your computer or laptop, then open VS2019, and select create a new project, then search for Integration Services and select Integration Services Project and submit.
This short SSIS tutorial explains how to get started with the Microsoft ETL. And the very first step is to install the extension in Visual Studio and create a first Integration Services project. Read this other tutorial on how to easily import XML documents into a database using SSIS.


Could not find PerfWatson2 in the details tab of Task Manager, but I did eventually find it in another tab and stopped it. Everything else went fine with the setup and I now have my first SSIS Project.
Good to hear, it’s great if it could help you installing the SSIS project.