Export data from a SQL Server table to a text file in CSV format with an SSIS package.
This tutorial explains how to export the SQL Server data into a CSV file with SSIS. The export here is in CSV format, and SSIS offers many other options. SSIS has been one of the leaders in the field of ETL and data integration for many years, having been on the IT market for decades and being recognized by large companies. In the 2022 Magic Quadrant for Data Integration Tools, Informatica is the overall leader and Microsoft SSIS is still in the leaders section.
Table of Contents
SSIS tutorial to export SQL Server data into a CSV file
Along with importing, exporting data is one of the classic tasks. This allows, for example, to provide updated data for another application. And thus to communicate throughout the company. A basic SSIS data export package consists of four main structuring elements:
- A control flow containing:
- A data flow, itself containing:
- An OLE DB Source component for the data source, a SQL Server table.
- A Flat File Destination component for the export target, a CSV file.
- A data flow, itself containing:
1. Prepare the SQL Server table to export in CSV
With SSMS, create the customer table. Then insert the following 24 rows into the table to export. This basic example dataset is used to run the package with a practical result. The goal is to successfully export this SQL Server sample data into a CSV file with a simple SSIS package, by following exactly those steps, and after to adapt the methodology to another package.
-- Create the customer's table
CREATE TABLE [dbo].[Customers](
   [CustomerID] [int] NOT NULL,
   [FirstName] [nvarchar](20) NULL,
   [LastName] [nvarchar](20) NULL,
   [City] [nvarchar](20) NULL,
   [Country] [nvarchar](50) NULL,
   CONSTRAINT [CustomersPrimaryKeyCustomerID] PRIMARY KEY CLUSTERED ([CustomerID] ASC)
);
GO

-- Insert 24 rows with customer data
INSERT INTO [dbo].[Customers] VALUES (1, N'Ali', N'Ahmed', N'Cairo', N'Egypt');
INSERT INTO [dbo].[Customers] VALUES (2, N'Johnny', N'John', N'Toronto', N'Canada');
INSERT INTO [dbo].[Customers] VALUES (3, N'John', N'Doe', N'Mexico City', N'Mexico');
INSERT INTO [dbo].[Customers] VALUES (4, N'Shu', N'Abbas', N'Paris', N'France');
INSERT INTO [dbo].[Customers] VALUES (5, N'Jeane', N'Raffin', N'Liushutun', N'China');
INSERT INTO [dbo].[Customers] VALUES (6, N'Legra', N'Leate', N'Błaszki', N'Poland');
INSERT INTO [dbo].[Customers] VALUES (7, N'Sullivan', N'Goadby', N'Xiaoguwei', N'China');
INSERT INTO [dbo].[Customers] VALUES (8, N'Tom', N'Ellams', N'Lop Buri', N'Thailand');
INSERT INTO [dbo].[Customers] VALUES (9, N'Trace', N'Fowell', N'Sriwing', N'Indonesia');
INSERT INTO [dbo].[Customers] VALUES (10, N'Christoffer', N'Rochford', N'Mburukullu', N'Indonesia');
INSERT INTO [dbo].[Customers] VALUES (11, N'Dru', N'Dunridge', N'Mistrató', N'Colombia');
INSERT INTO [dbo].[Customers] VALUES (12, N'Dud', N'Gravenor', N'Sandaogou', N'China');
INSERT INTO [dbo].[Customers] VALUES (13, N'Lori', N'Garshore', N'Jeziora Wielkie', N'Poland');
INSERT INTO [dbo].[Customers] VALUES (14, N'Cordy', N'Kentish', N'Vydreno', N'Russia');
INSERT INTO [dbo].[Customers] VALUES (15, N'Ancell', N'Wileman', N'Claresholm', N'Canada');
INSERT INTO [dbo].[Customers] VALUES (16, N'Elsworth', N'Chantrell', N'Sumberjo', N'Indonesia');
INSERT INTO [dbo].[Customers] VALUES (17, N'Beverly', N'Giraudy', N'Cigembong', N'Indonesia');
INSERT INTO [dbo].[Customers] VALUES (18, N'Tamas', N'Zavattiero', N'Jangkat', N'Indonesia');
INSERT INTO [dbo].[Customers] VALUES (19, N'Benedick', N'Schaffler', N'Itaparica', N'Brazil');
INSERT INTO [dbo].[Customers] VALUES (20, N'Leonard', N'Brimman', N'Moscow', N'Russia');
INSERT INTO [dbo].[Customers] VALUES (21, N'Morton', N'Capelle', N'Uk', N'Russia');
INSERT INTO [dbo].[Customers] VALUES (22, N'Larissa', N'Rawle', N'Tembayangan Barat', N'Indonesia');
INSERT INTO [dbo].[Customers] VALUES (23, N'Karalee', N'Wall', N'Clifden', N'Ireland');
INSERT INTO [dbo].[Customers] VALUES (24, N'Miller', N'Shakesbye', N'Gongnong', N'China');

Check that all 24 rows are present in the database with a simple select query or a count with the COUNT aggregation function.
SELECT COUNT(*) AS [LINES]
  FROM [dbo].[Customers];
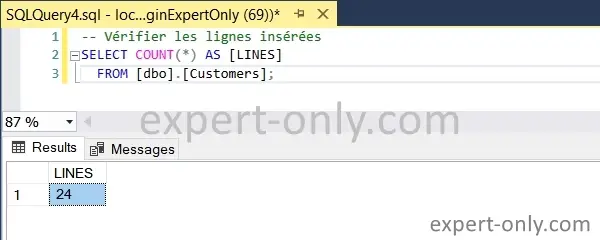
Check the number of rows inserted in the customer’s table
Also run a selection SQL query to check the rows and their consistency.
SELECT *
FROM [dbo].[Customers];
2. Create the SSIS package and the data flow
First, open Visual Studio and create a new SSIS project. Then open an existing package or create a new one. Then, from the SSIS Toolbox, select Data flow Task and drag it into the workspace and double click it.

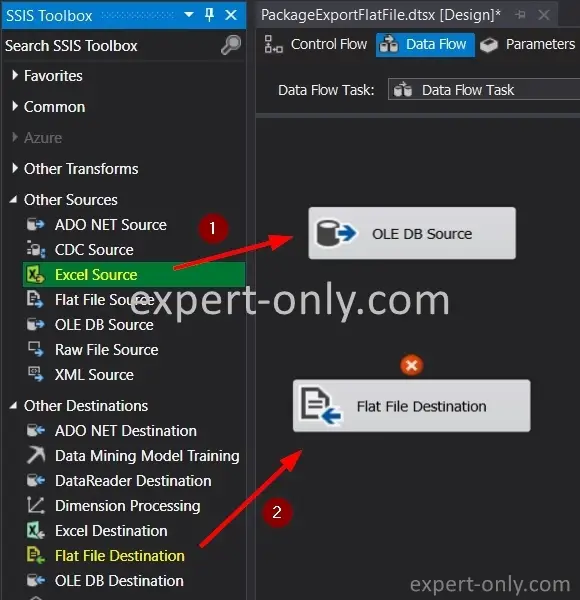
Now, from the Data Flow tab, select the SSIS OLE DB Source component. Indeed, to export from a SQL Server database, it is the one recommended in this case. Also select the Flat File Destination component and drag it onto the workspace. In this case, it is a CSV file export, in a specific directory.
3. Configure the SQL Server source table with OLE DB
Use an existing one or create a new database connection with the SSIS connection manager. Then select the connection.

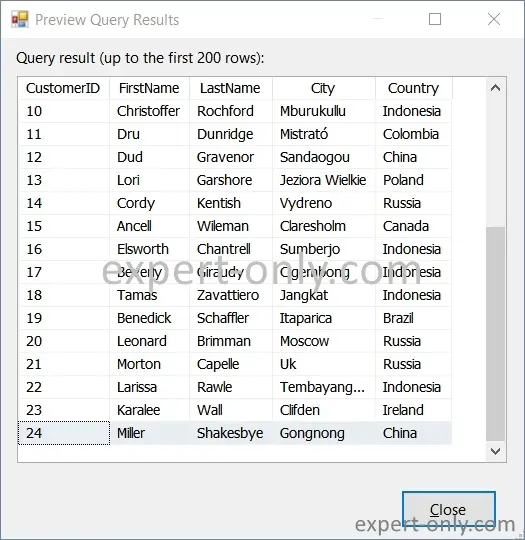
In the OLE DB Source Editor window, select the SQL Server database and table to export to the text file with SSIS: dbo.Customers.

Click on the view button to check the data for export.
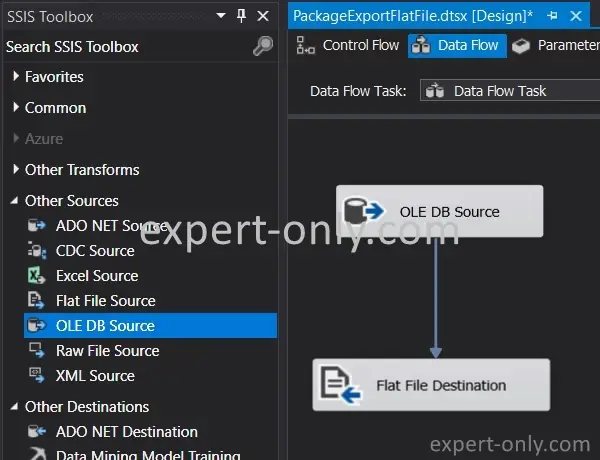
Then link the OLE DB Source component with the Flat File Destination component with the arrow.
Once the SQL Server source table is configured, the second part of the tutorial is to link the two SSIS components and configure the output file with CSV format.
4. Set up the SSIS connection to the CSV file
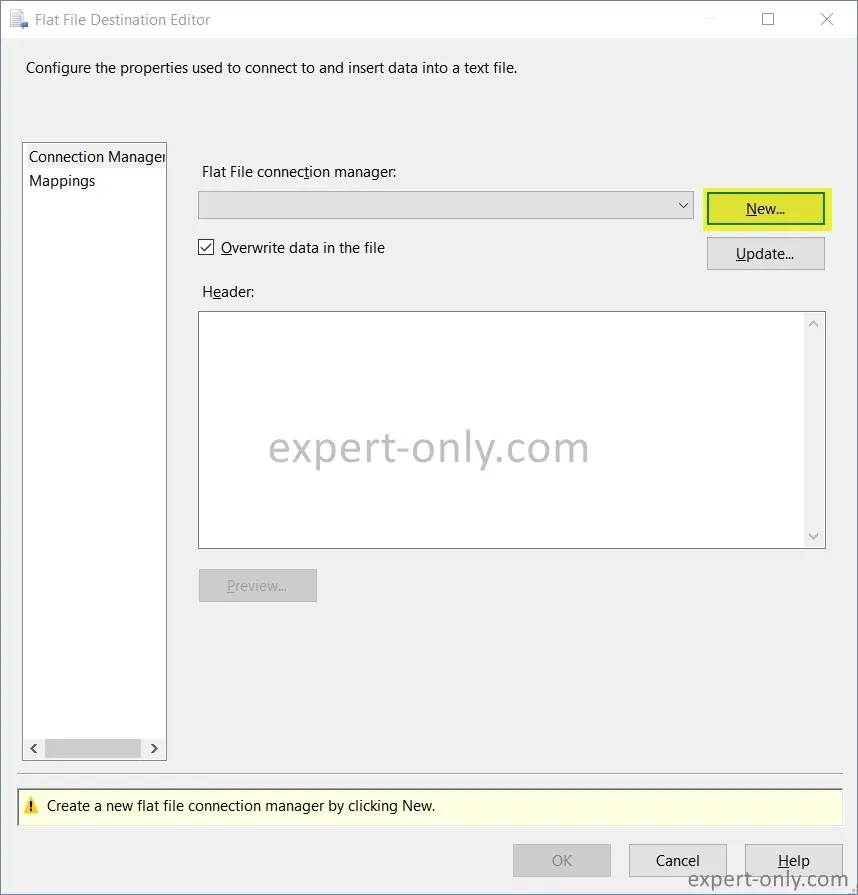
Create a new destination flat file connection with the graphical editor, follow these steps. First, open the Flat File Destination Editor with a right-click on the component.
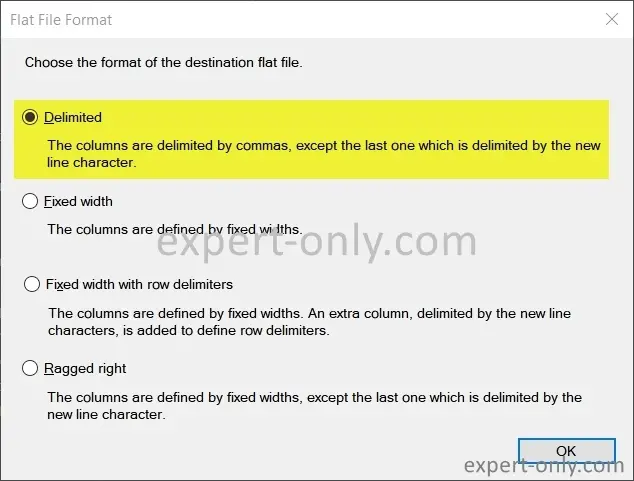
Choose the format of the destination flat file type with a Delimited format, i.e., the columns are separated by a separator. The semi-colon is widely used in data integration projects, because in typical business columns like First Name, Last Name, address, company, it is not used frequently.
Now select the type of file in which to export the data, in this case a flat file with a CSV extension. Set the following items.
- The name of the connection to the text file: Customers_Export.csv
- The full path of the file: C:\data\Customers_Export.csv
- The encoding of the file: 65001 (UTF-8) to handle the special characters contained in the table
- Check the header delimiter: {CR}{LF}
Of course, in a particular project environment, these settings depends on your region and me adapted to a real world scenario.
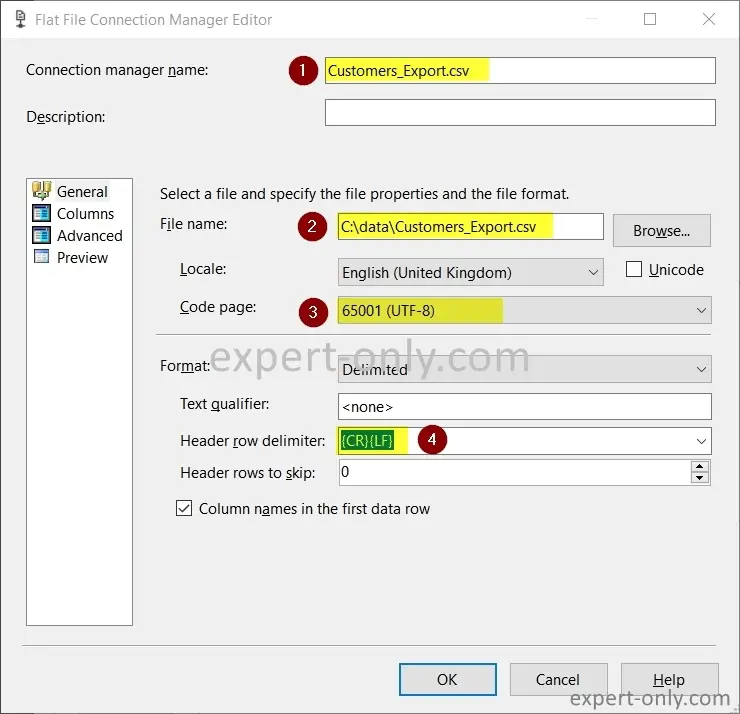
For the file name, from the General tab. Click Browse and choose the location of the text file to be exported with SSIS. If it does not exist, simply enter a path and the Integration Services package will create the file when the package is run.
5. Configure the target columns to export in CSV
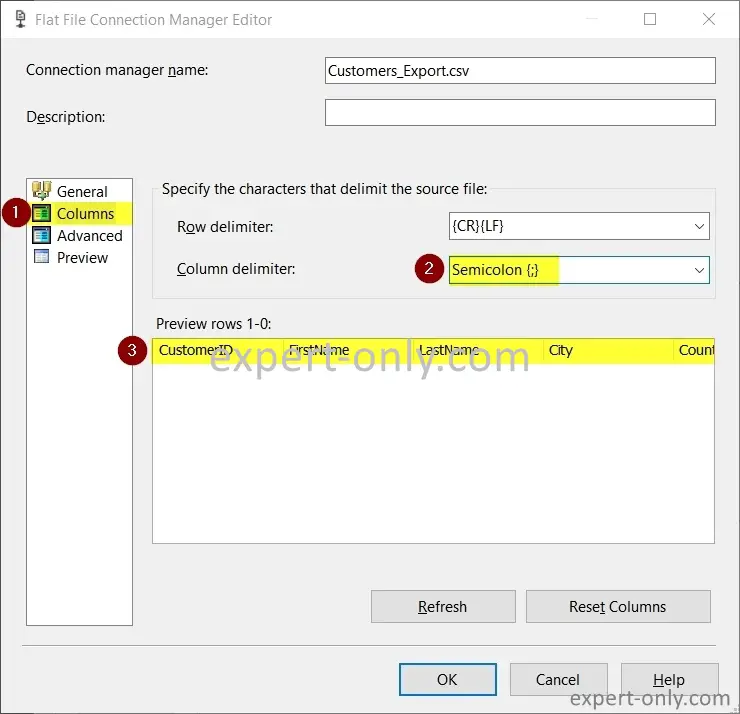
Then click on the Columns tab and choose the delimiter type for the columns and rows.
- Select the Columns tab.
- Choose the Column delimiter as a semicolon: ;
- Check the column names.
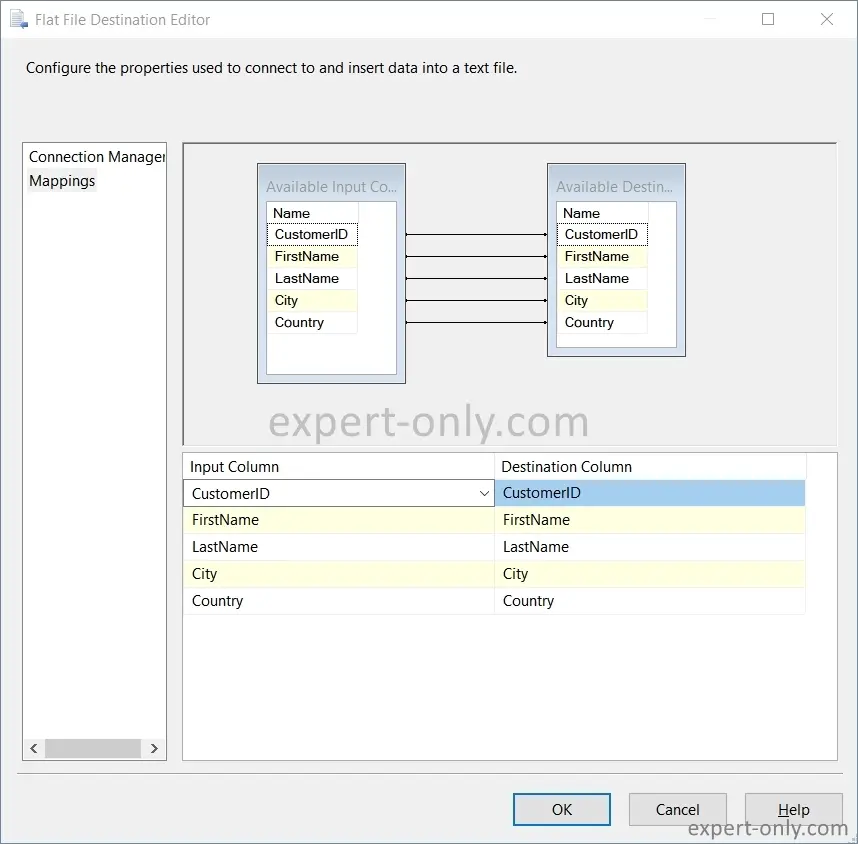
Check now the columns mapping. By default, SSIS automatically maps the source with the target columns. Indeed, for the text file, it creates columns of the same type, length, and name as the source.
6. Run the SSIS package and check the CSV data
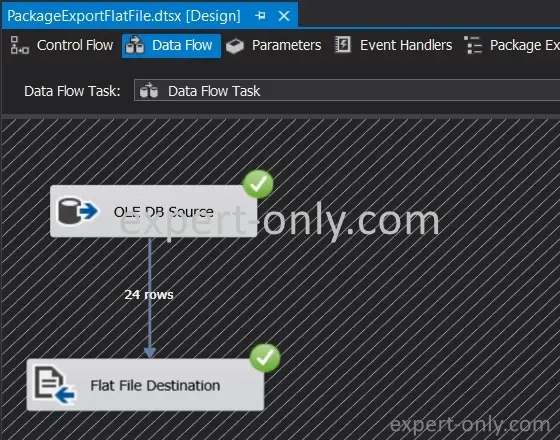
Now run the data export package with the Execute button on the top menu. Or press F5, check beforehand that the package is defined as a start object in the project settings. The data export then starts from the source table to the target text file in CSV format. 24 rows are exported successfully.
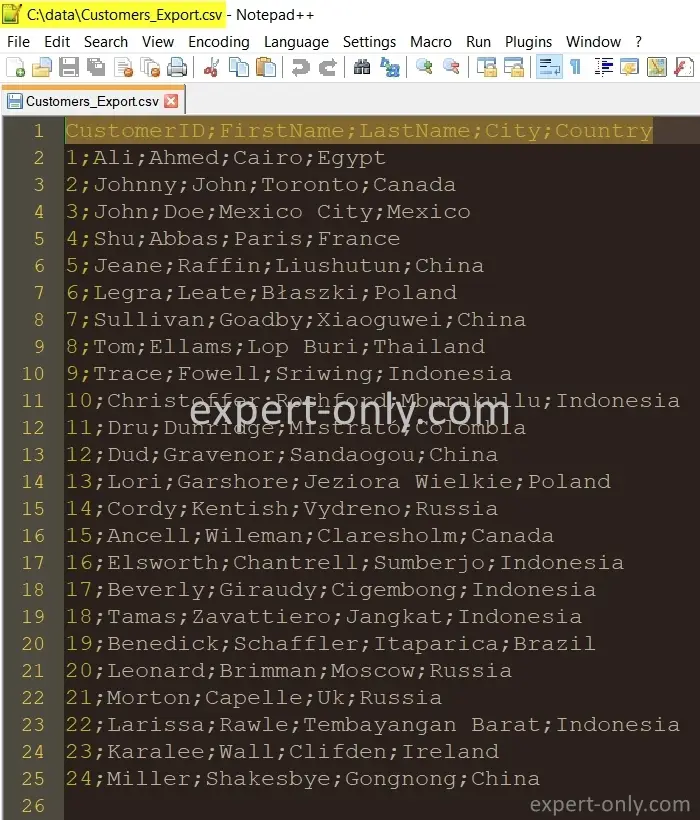
After execution, the customer table data stored in the SQL Server database is exported and available as a text file. Now open the file and check the result and the consistency of the data between the table and the file.
Conclusion on SQL Server data export to CSV with SSIS
Finally, this SSIS tutorial explains how to create an SSIS package to export an MS SQL table to a text file, in CSV format, delimited by a semicolon. If the data is prepared in advanced with the proper data types and column names, SSIS makes the task much easier as the mapping is automatic, and the export management is quite ergonomic.
Tutorials about data import and export with SSIS
- Import XML documents into SQL Server with SSIS
- Load multiple CSV files into a SQL table with SSIS
- Import Excel data into SQL Server with SSIS
The following SSIS tutorial explains how to do the reverse operation, i.e., import a CSV file into SQL Server table with SSIS.


Be the first to comment