SQL Server tutorial on how to Import data from an Excel file into a database, using the SQL Server wizard and without code.
To do this, use the Data Import Wizard from SQL Server Management Studio. In this example, here is how to import data from a source Excel file to a SQL Server target table. To Import an Excel file with SSMS, this is the easiest guided option.
Table of Contents
How to import data from Excel with the SQL Server wizard ?
The Excel file for the example is shown in the screenshot below. Here is the Clients tab which contains the data to be loaded into the database. Here is an article on where and how to download SQL Server.

1. Run the SQL Server Import and Export Wizard task
First, in SQL Server Management Studio:
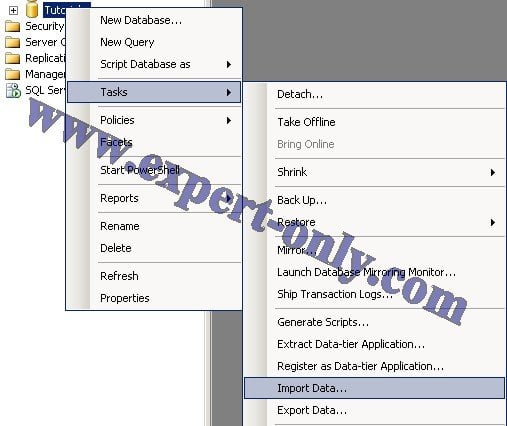
- Right-click on the database where the table that will be hosting the data is stored
- Then click on Task
- And then on Import Data to open the SSMS wizard.
2. Select the Data Source type
In the SQL Server Import and Export Wizard window:
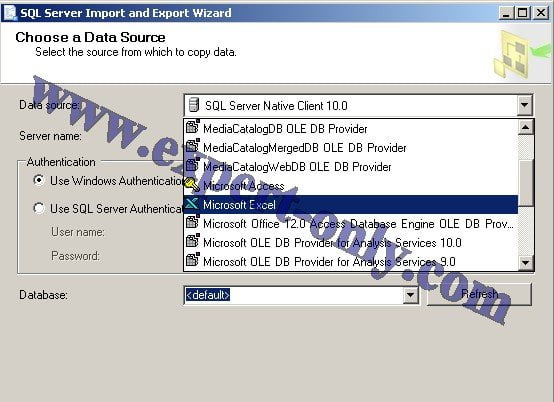
- First select the source of your load, you will have the choice between a multitude of media file types.
- In our case it is an Excel file, so we choose Microsoft Excel.
3. Input the Excel file path to import
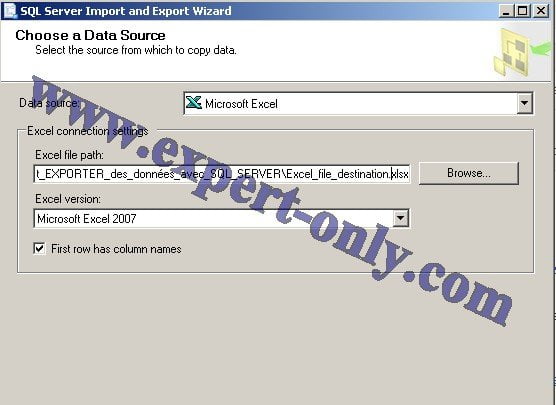
Now indicate the location of the file on the computer or the server. To do this, click on Browse and select the file from which you want to import the data into the database.
4. Select the target database
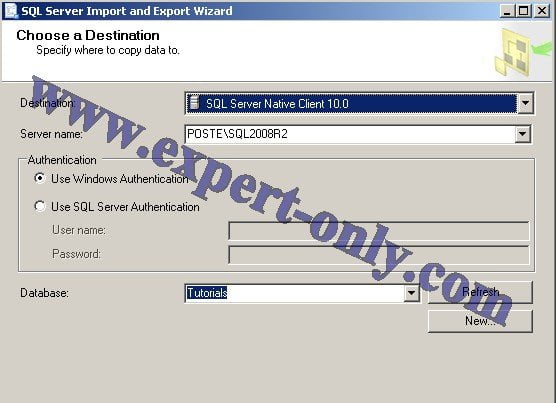
Now select the database to be used for importing data from the Excel file and then click on Next. Here the target database is a 2008 R2 version but it also works with SQL Server 2012, SQL Server 2016 and SQL Server 2019.
5. Select the Excel file import method
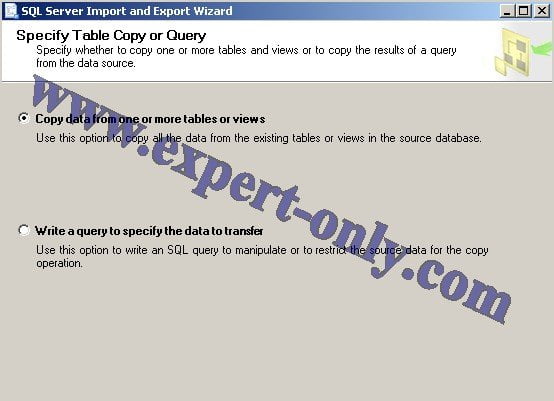
Next, choose how to select your data within your Excel file. You will have the choice between:
- Selecting the Excel tabs to import by ticking them.
- Entering a SQL query to execute in Excel.
In our case, we will choose the tabs to select.
6. Select the Excel tabs to load
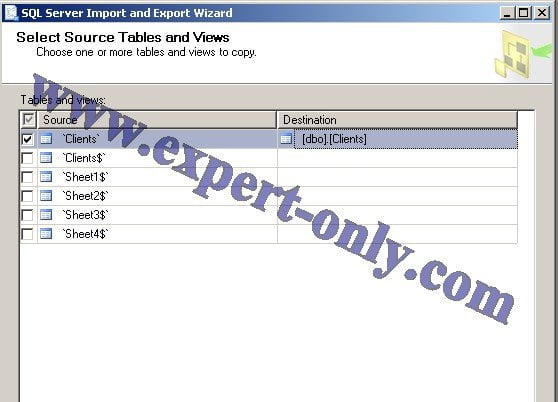
Next, check the tabs to import and choose which table to integrate them into. In this case it will be the table named Clients.
7. Configure the column mappings from Excel to MS SQL
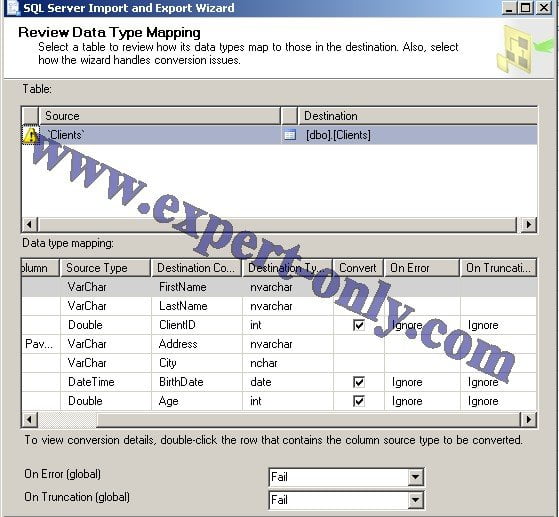
Sometimes there are inconsistencies between the Excel columns format and the database columns in the table. Ignore this format difference in the “on Error” column. To do this, choose Ignore.
8. Execute the package created by the Import and Export Wizard
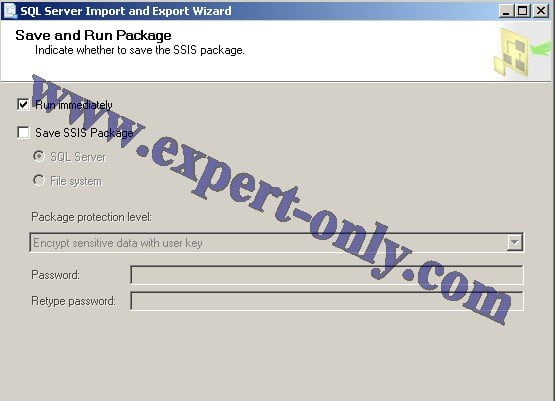
It is possible to save the package in SSIS format for later use. We will thus check the run immediately box to proceed directly to the import of the Excel file into the SQL Server database.
Indeed, to import the same Excel file again with SSMS, simply save the SSIS package generated automatically by the SSMS wizard and run it again. To do this, check the Save SSIS Package box.
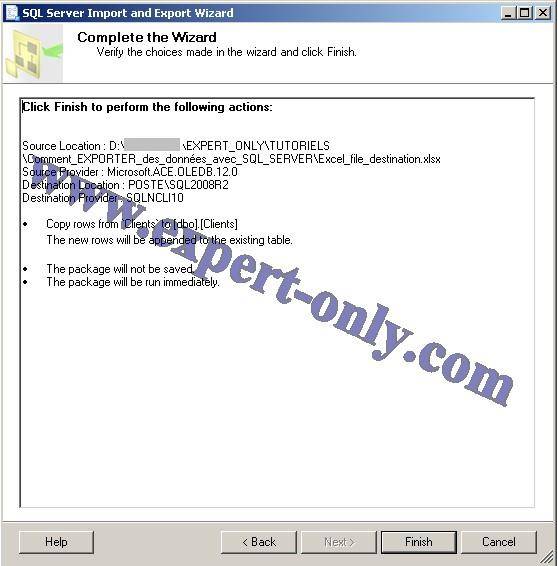
9. Check the summary of the Excel file import
A summary of the operations performed is displayed. Read this summary carefully to check the parameters. Then click on the Finish button to launch the import.
10. Check the import execution results and the data
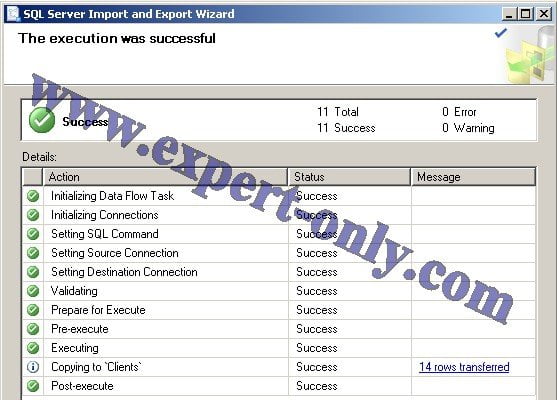
A screen is displayed with details of all the data transfer steps. The result of the Excel import is then displayed. In this case, all the steps were successful.
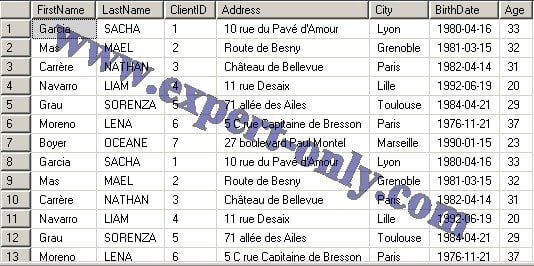
Finally, the data contained in the Excel file Client and in the Clients tab have been imported successfully into the MS SQL table.


Be the first to comment